Integrate Continue with Jan and VS Code
Quick Introduction
Continue is an open-source autopilot for VS Code and JetBrains—the easiest way to code with any LLM.
In this guide, we will show you how to integrate Continue with Jan and VS Code, enhancing your coding experience with the power of the local AI language model.
Steps to Integrate Continue with Jan and VS Code
1. Install Continue for VS Code
To get started with Continue in VS Code, please follow this guide to install Continue for VS Code.
2. Enable Jan API Server
To configure the Continue to use Jan's Local Server, you need to enable Jan API Server with your preferred model, please follow this guide to enable Jan API Server.
3. Configure Continue to Use Jan's Local Server
Navigate to the ~/.continue directory.
- macOS
- Windows
- Linux
cd ~/.continue
C:/Users/<your_user_name>/.continue
cd ~/.continue
Edit the config.json file and include the following configuration.
{
  "models": [
    {
      "title": "Jan",
      "provider": "openai",
      "model": "mistral-ins-7b-q4",
      "apiKey": "EMPTY",
      "apiBase": "http://localhost:1337/v1"
    }
  ]
}
- Ensure that the
providerisopenai. - Ensure that the
modelis the same as the one you enabled in the Jan API Server. - Ensure that the
apiBaseishttp://localhost:1337/v1. - Ensure that the
apiKeyisEMPTY.
4. Ensure the Using Model Is Activated in Jan
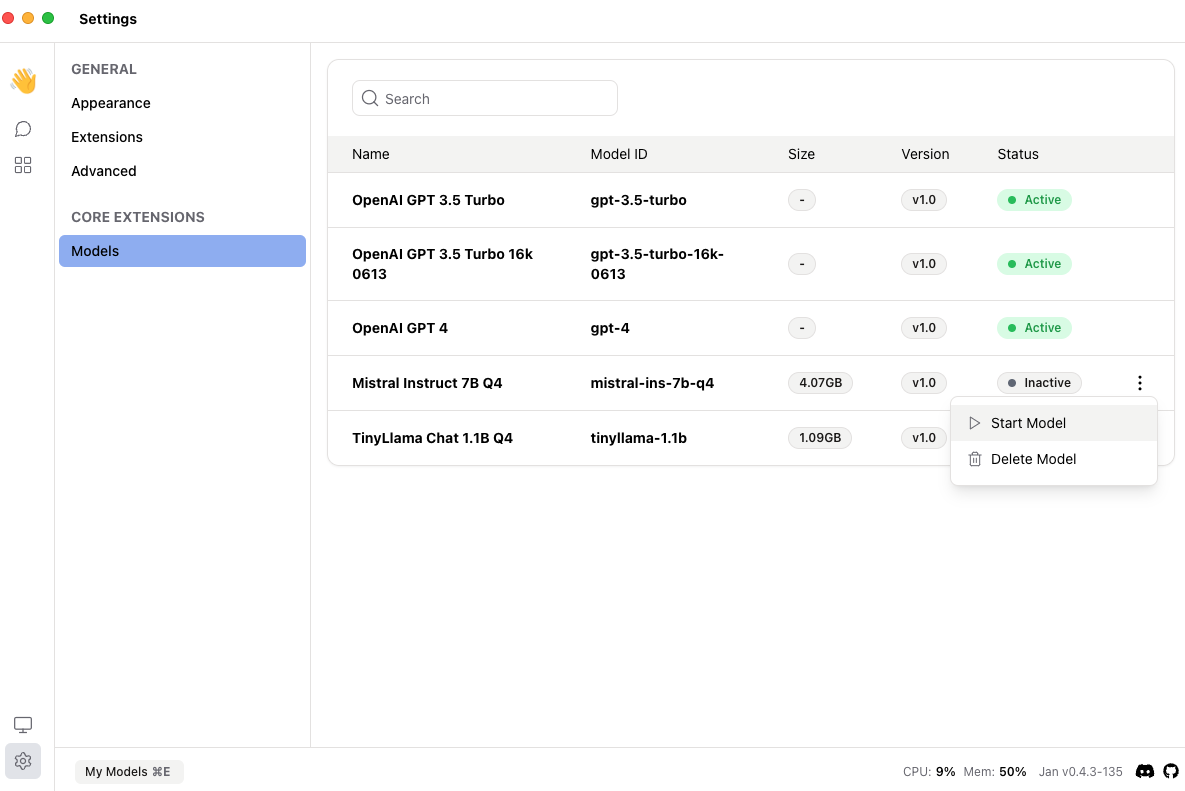
Navigate to Settings > Models. Activate the model that you want to use in Jan by clicking the three dots (⋮) and start model.

5. Try Out the Integration of Jan and Continue in VS Code
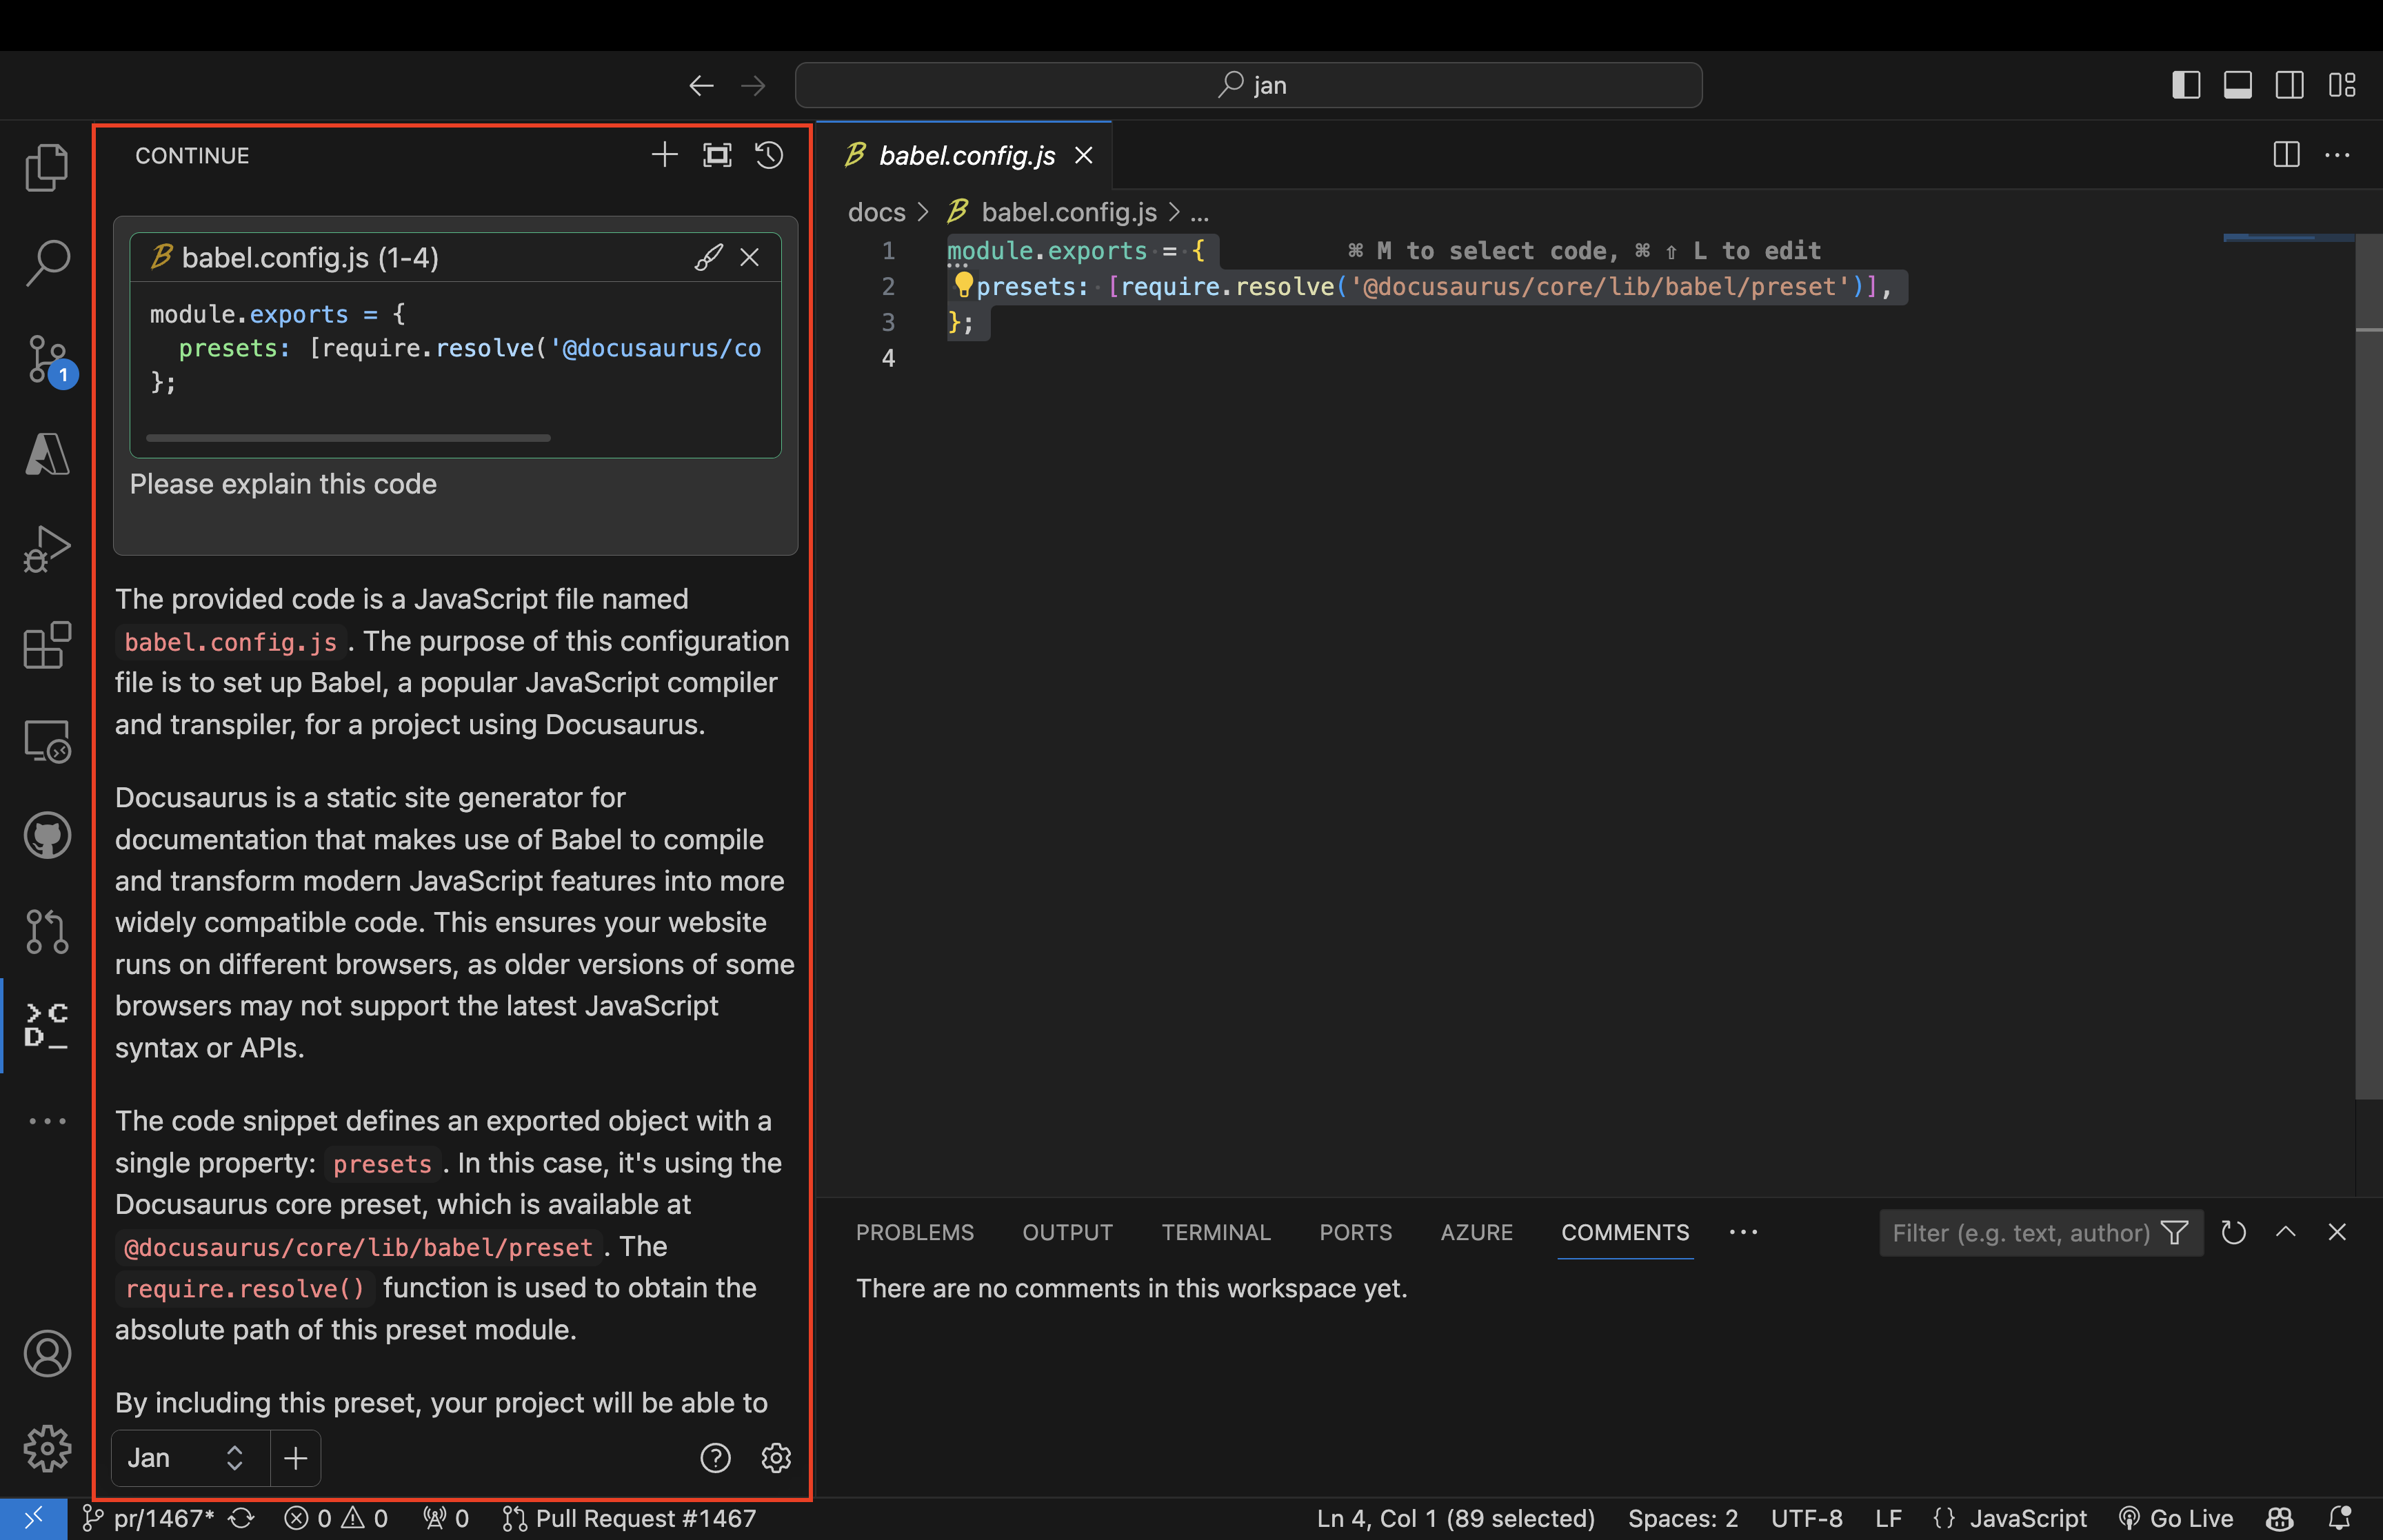
Asking questions about the code
- Highlight a code snippet and press
Command + Shift + Mto open the Left Panel. - Select Jan at the bottom and ask a question about the code, for example,
Explain this code.

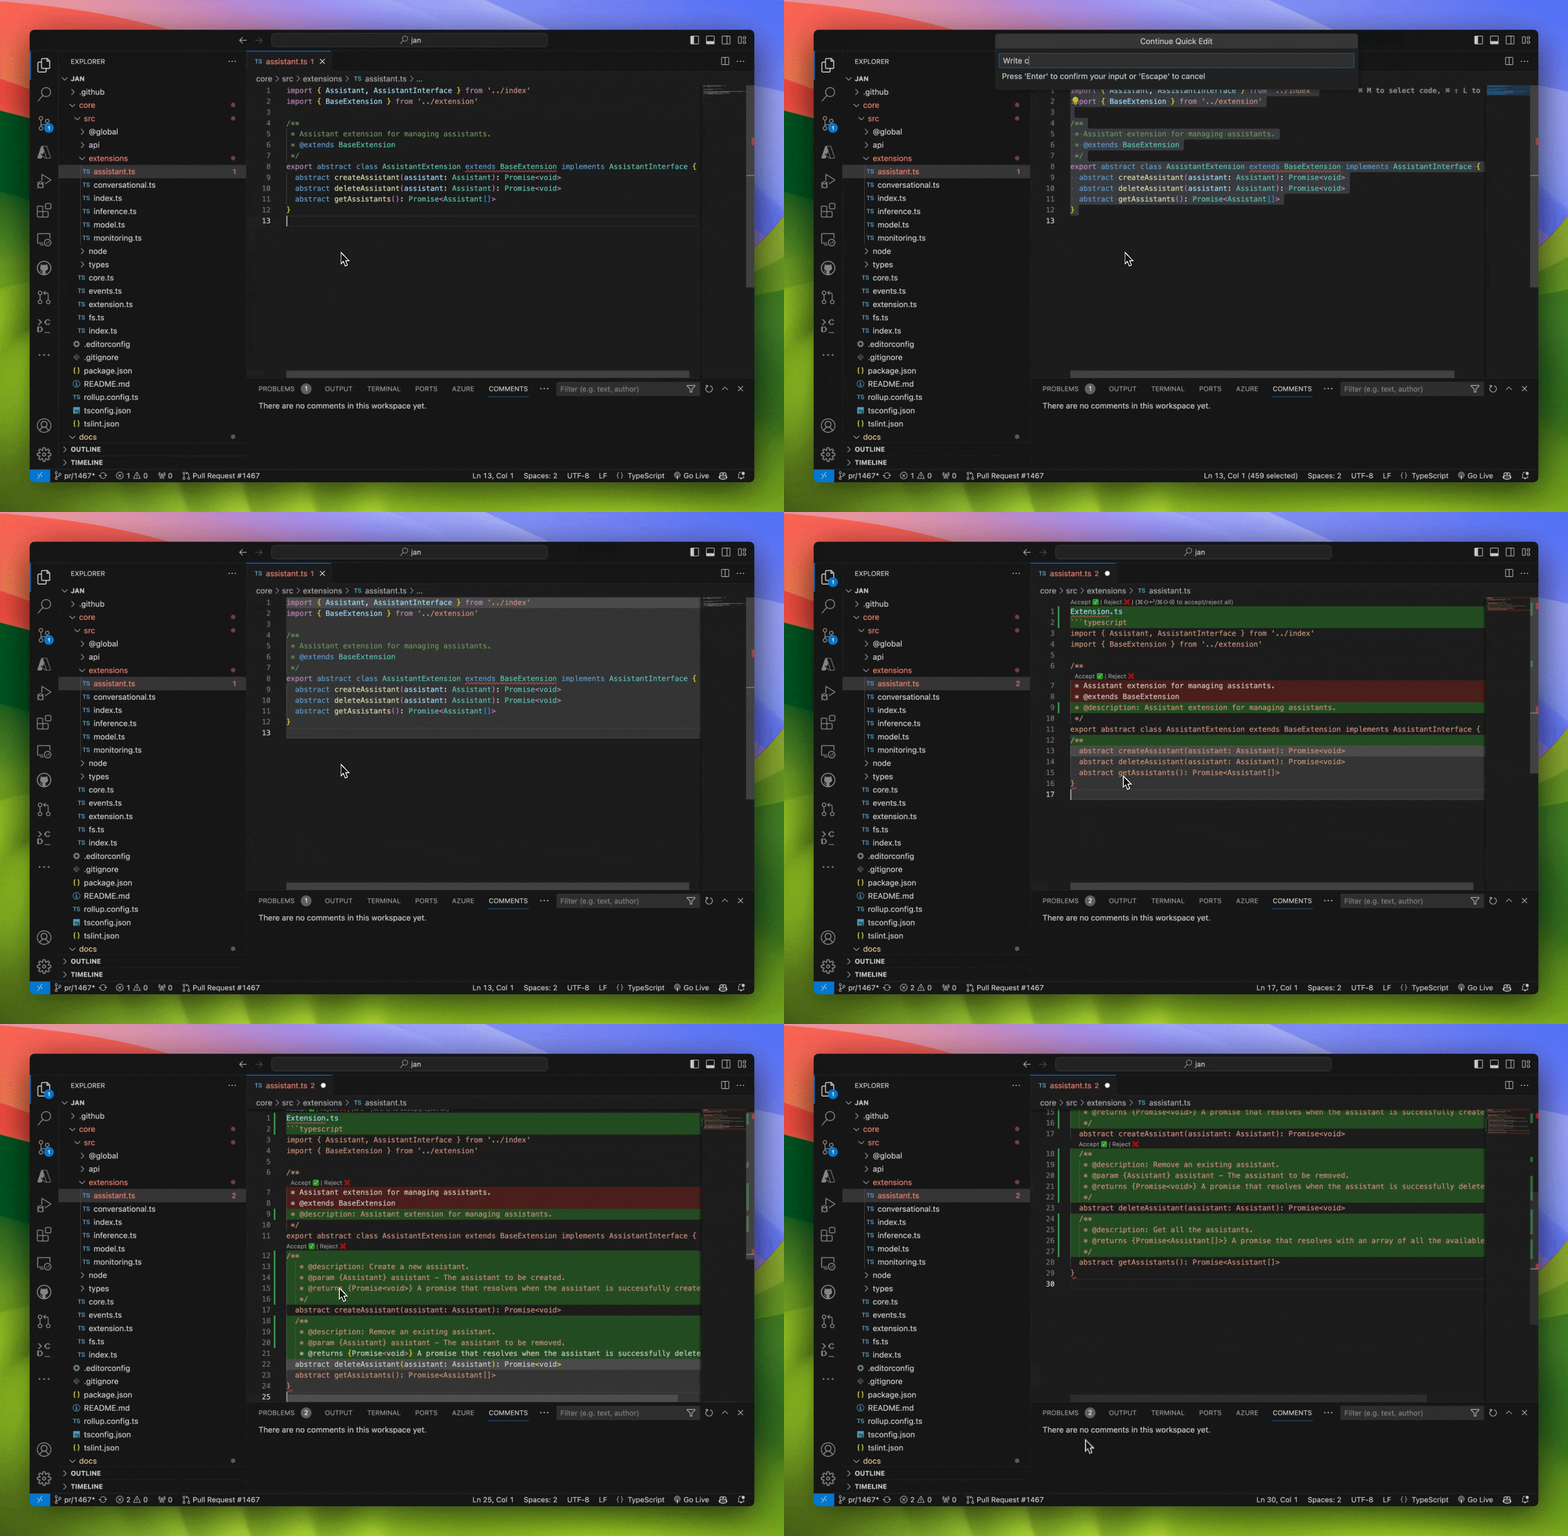
Editing the code with the help of a large language model
- Highlight a code snippet and press
Command + Shift + Land input your edit request, for example,Write comments for this code.
